Instruction:
There are three routes to run python.
- The first route is to use google colab at colab.research.google.com, where you create colab notebooks consisting of text and code blocks. Your notebooks are saved in your google drive. Don't follow the rest of this page if you choose this route.
- The second route is to install standard Python. This route is documented in later part of this page. This route is not recommended because you may encounter package conflicts if you or other users installed too many packages of different version.
- The third route is to install Anaconda or Miniconda and then create separate environments for different needs. This is a recommended route, and this page documents this option with details.
This guide consists of instructions of four types of setup, and you choose the type(s) as needed:
- First, install, configure, and run Miniconda 3 with Python 3.9. This is a required step if you choose Route 3.
- Second, create conda environments with important extensions and libraries such as Jupyter Lab, Pycharm, and Tensorflow for your classes. Chose to create environments per your class.
- Third, install standalone Python without Miniconda. Part 3 is followed if you don't want to follow Route 2.
- Part 4 shows how to use Python in both command line and GUI tools such as Anaconda Prompt, Jupyter Lab, and PyCharm. This step is followed per your class.
Before you start, you may want to remove other Python installations to avoid version and registry conflicts. You can do so by going to Control Panel and Uninstall Programs.
Install Miniconda with Python 3.9 (required for Route 3)
- Download minconda3: download Miniconda3-py39_23.5.2-0-Windows-x86_64.exe for the version that comes with Python 3.9.
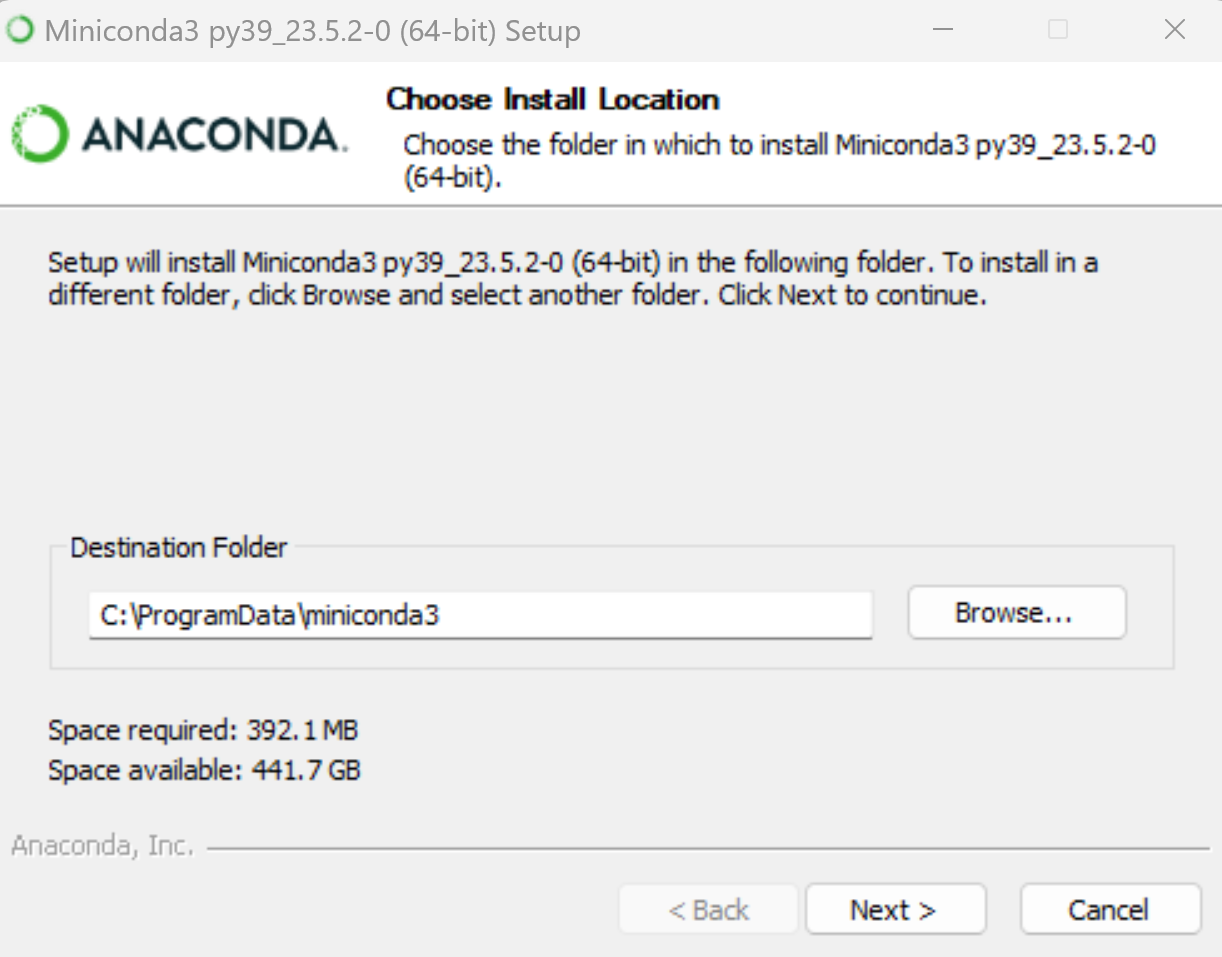
- Double click on the downloaded file, follow the direction, and choose to install for all users and file location as C:\ProgramData\miniconda3
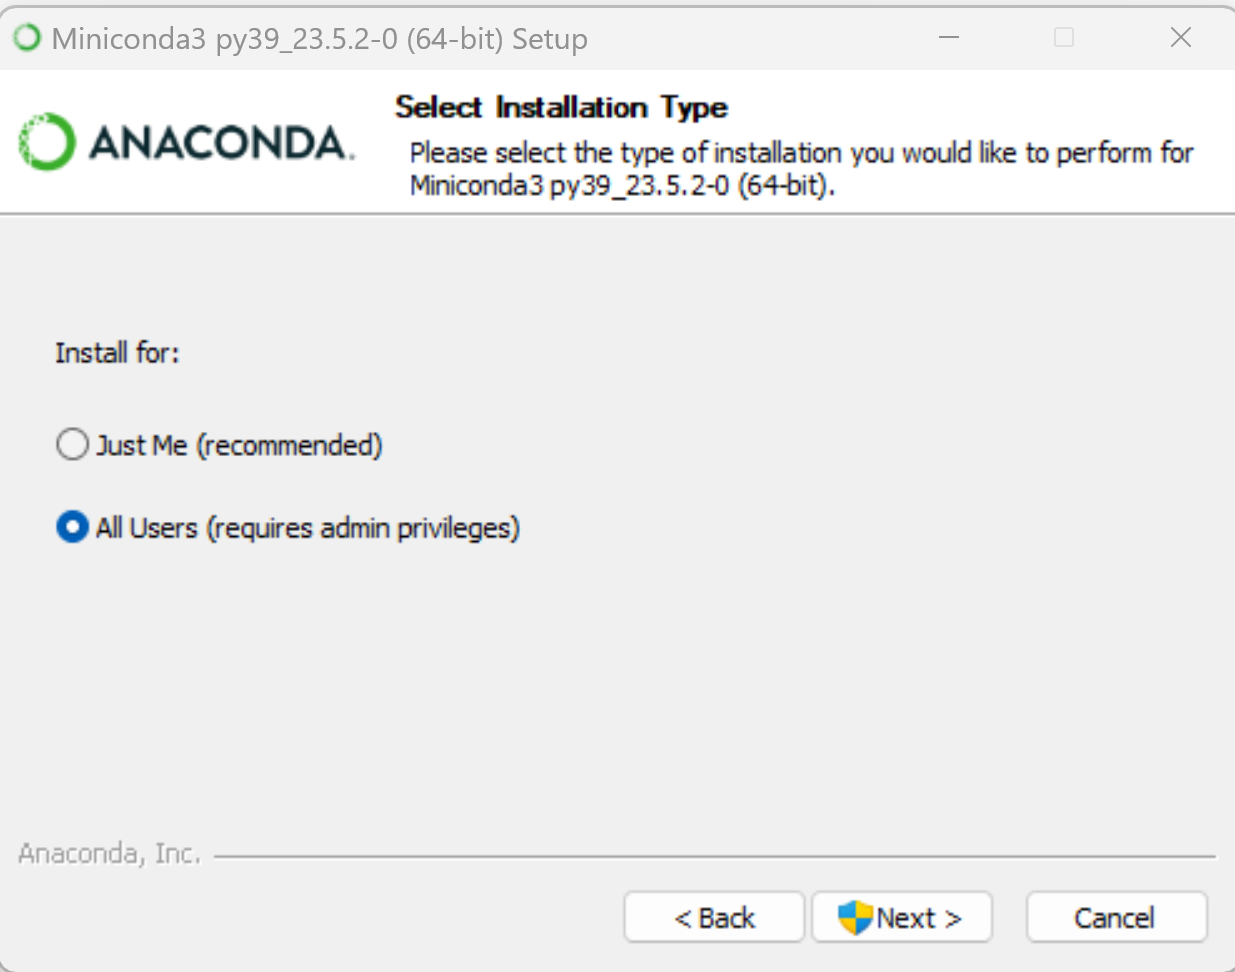
- Choose to install Miniconda to C:\ProgramData\miniconda3
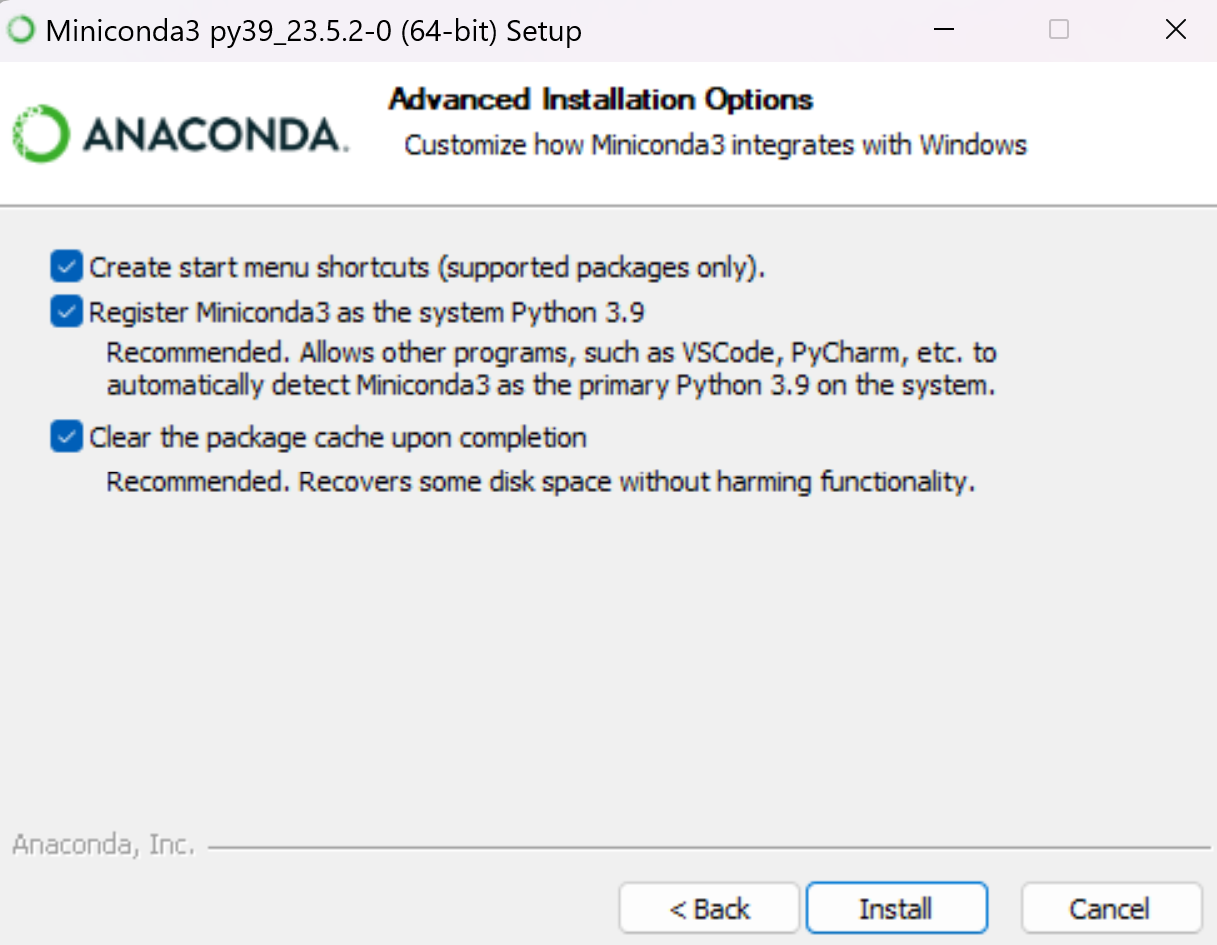
- Check all the boxes in the next step and click Install button to finish.
- Add three Anaconda binary code folders C:\ProgramData\miniconda3, C:\ProgramData\miniconda3\condabin, and C:\ProgramData\miniconda3\Scripts to the system PATH. Environment variable "Path" allow the system to find the program by searching the program in the specified paths. The following shows how to use the environment variable to add, delete, or modify a path. You can also download AddCondaPath.zip, extract AddCondaPath.bat file, right click on the batch file to run as administrator instead of following manual steps.
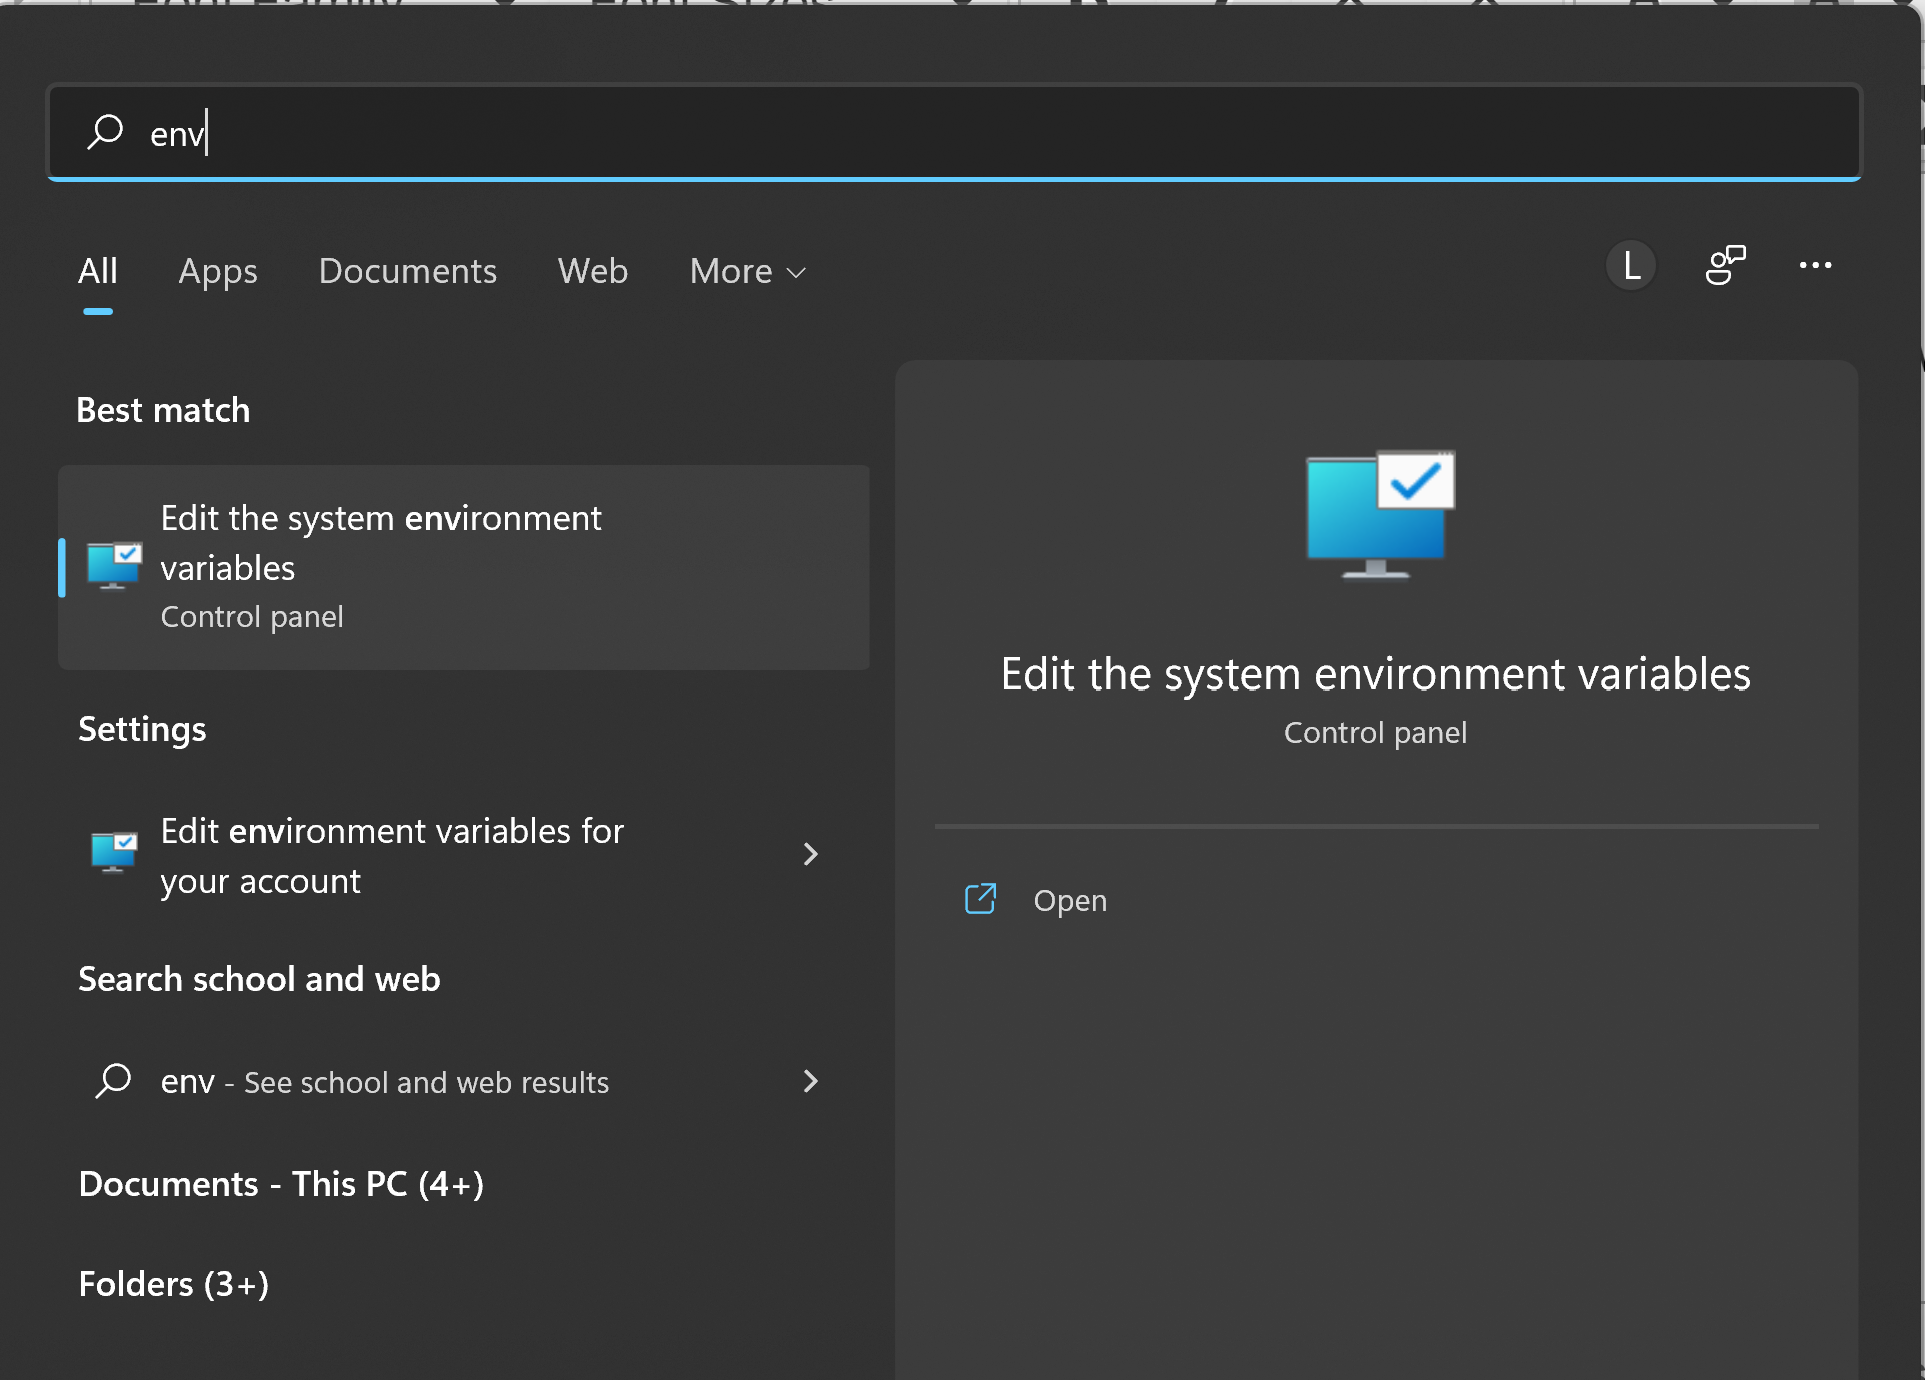
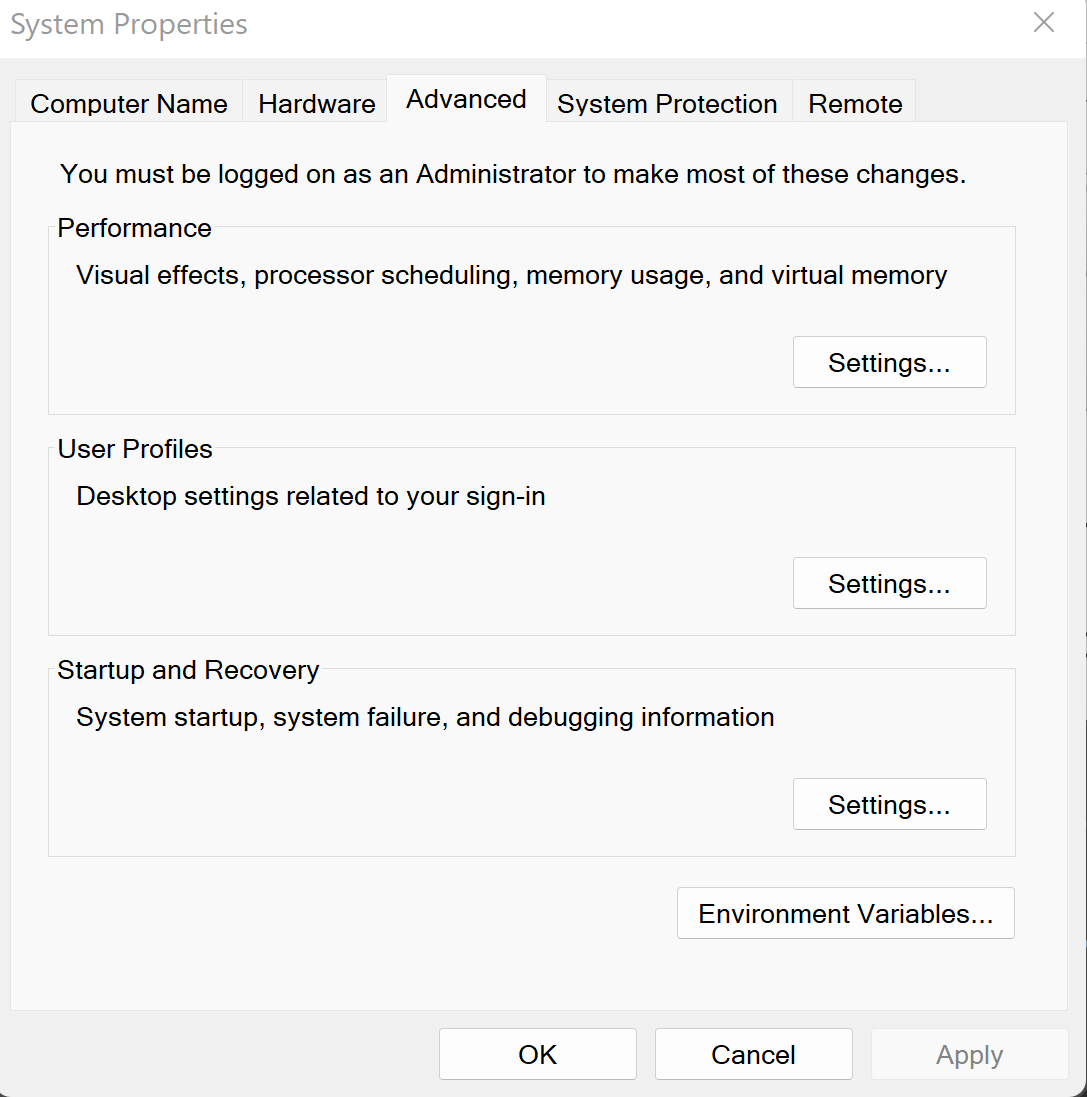
- click on the search box and type "env" and choose "Edit the system environment variables" to open System Properties.
- Click on "Environment Variables" button
- Note that there are two different sets of environment variables (see below). The top one "User Variables" is for the current user and the lower one "System Variables" is for all the users of your computer.
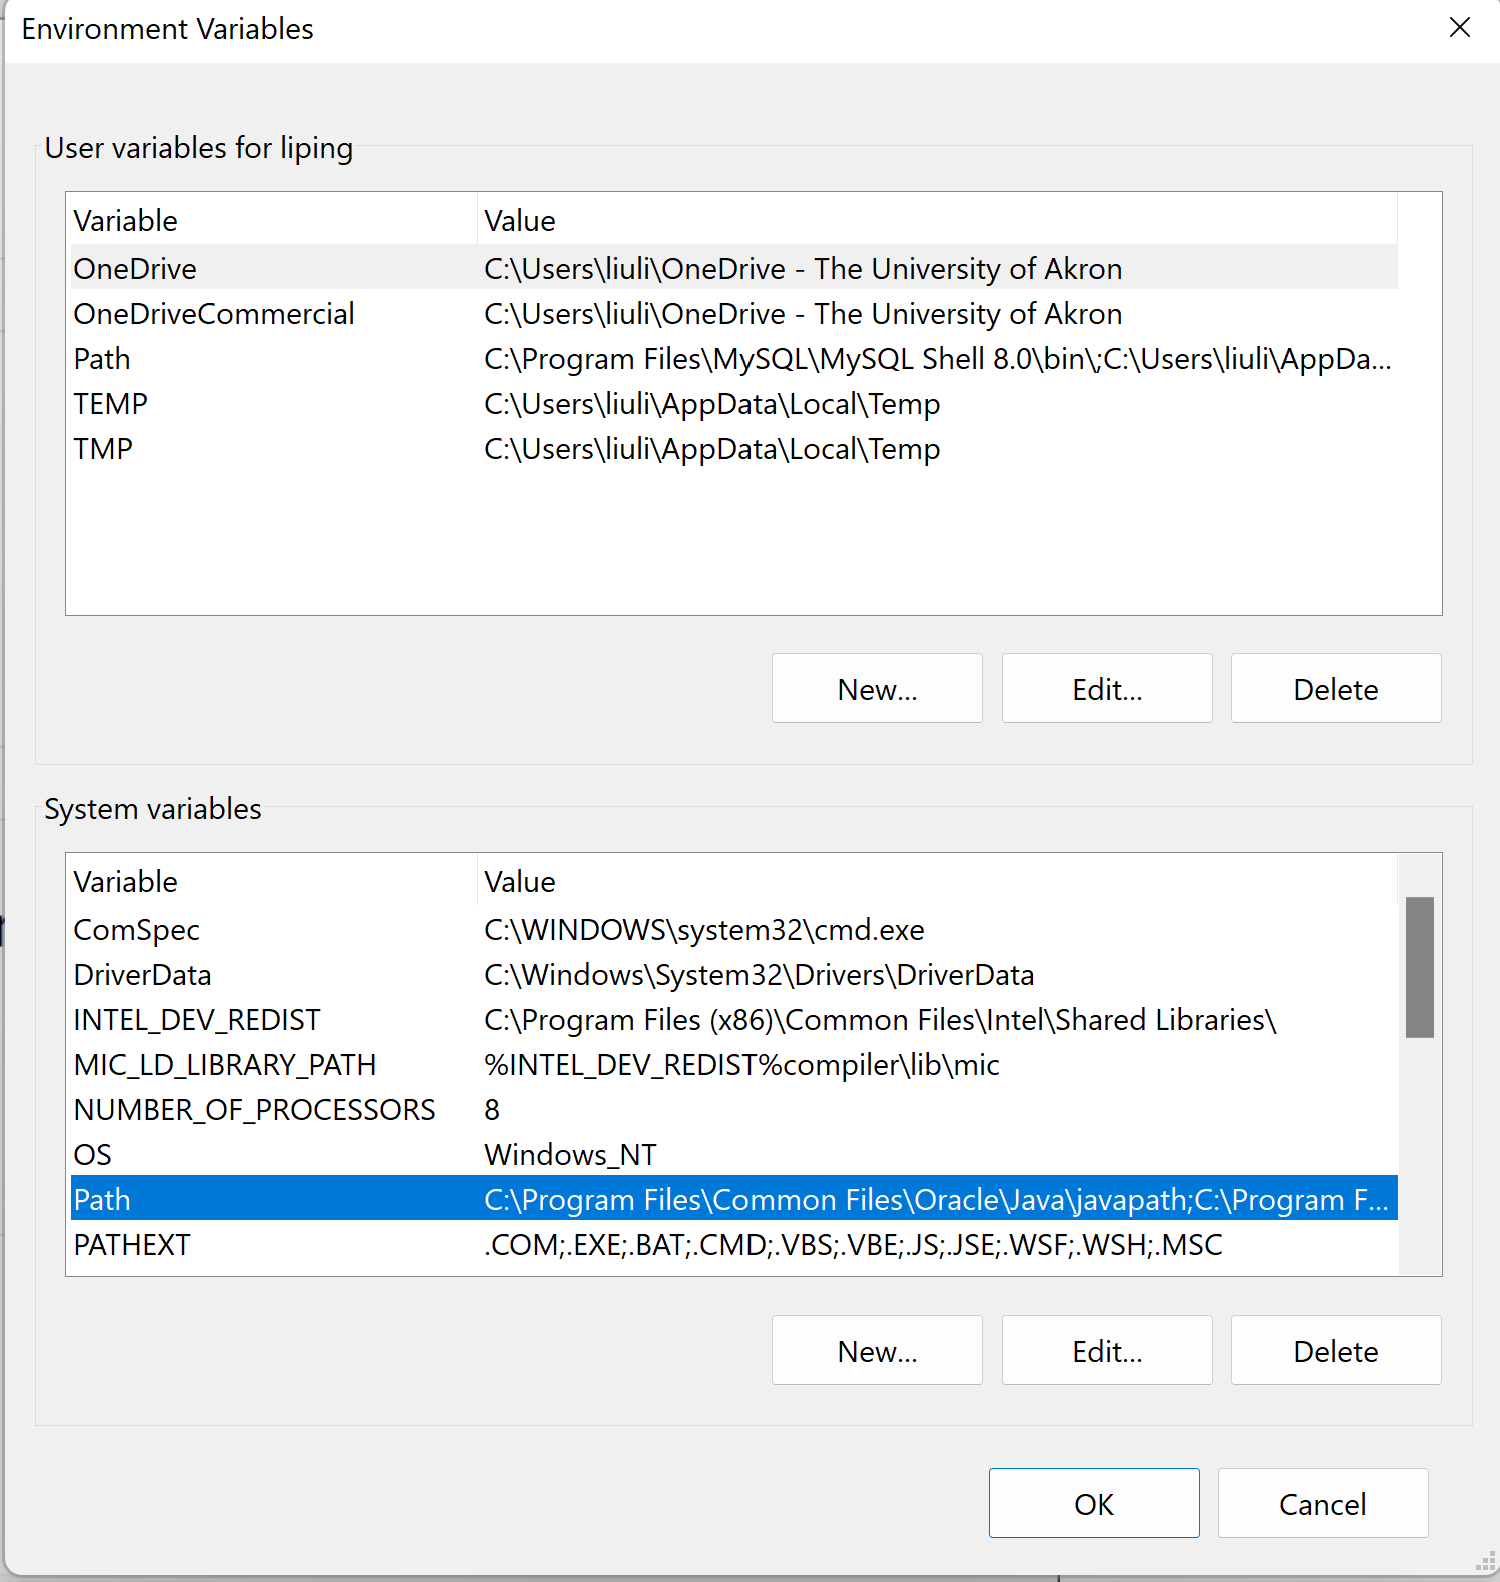
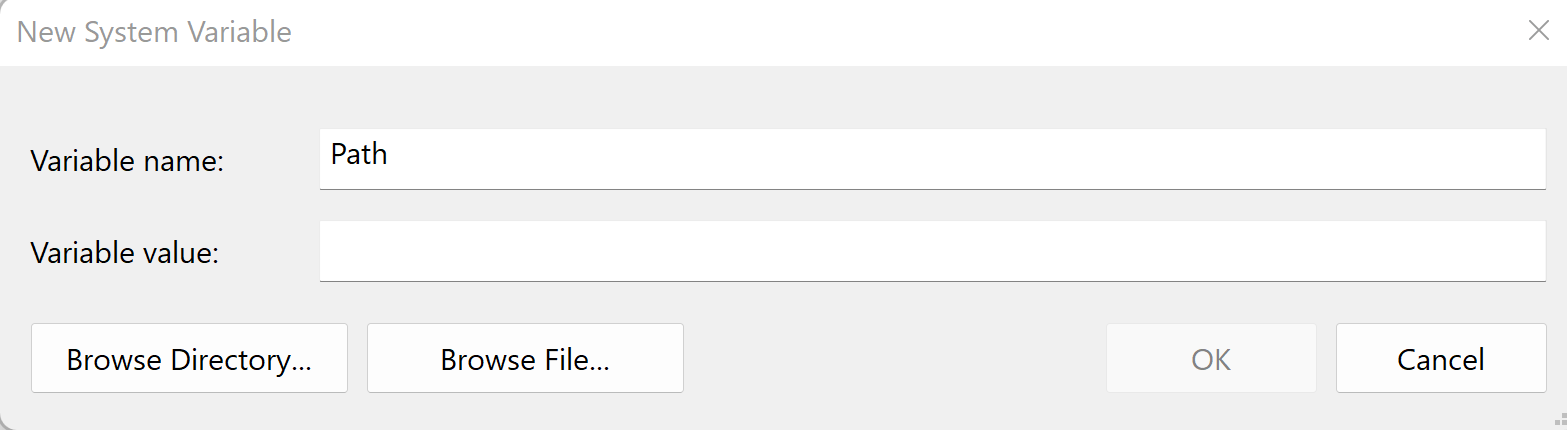
- If Path variable does not exist, click New button and enter the name "Path" (see the photo below) and then enter "C:\ProgramData\miniconda3\condabin" as Variable value or press Browse Directory button to find the program's folder.
- If the "Path" variable already exists, press Edit button and you will see a list of paths that are currently in place. To add a new path, click on New button and you you will see a new black entry in the list. Enter "C:\ProgramData\miniconda3\condabin" or click "Browse ..." button to navigate to the location. Do the same for C:\ProgramData\miniconda3 and C:\ProgramData\miniconda3\Scripts folders.

- Press a few OK buttons to dismiss dialog boxes to close System Properties.
- Finally, you will need to log out and re-log in to make the variable effective.
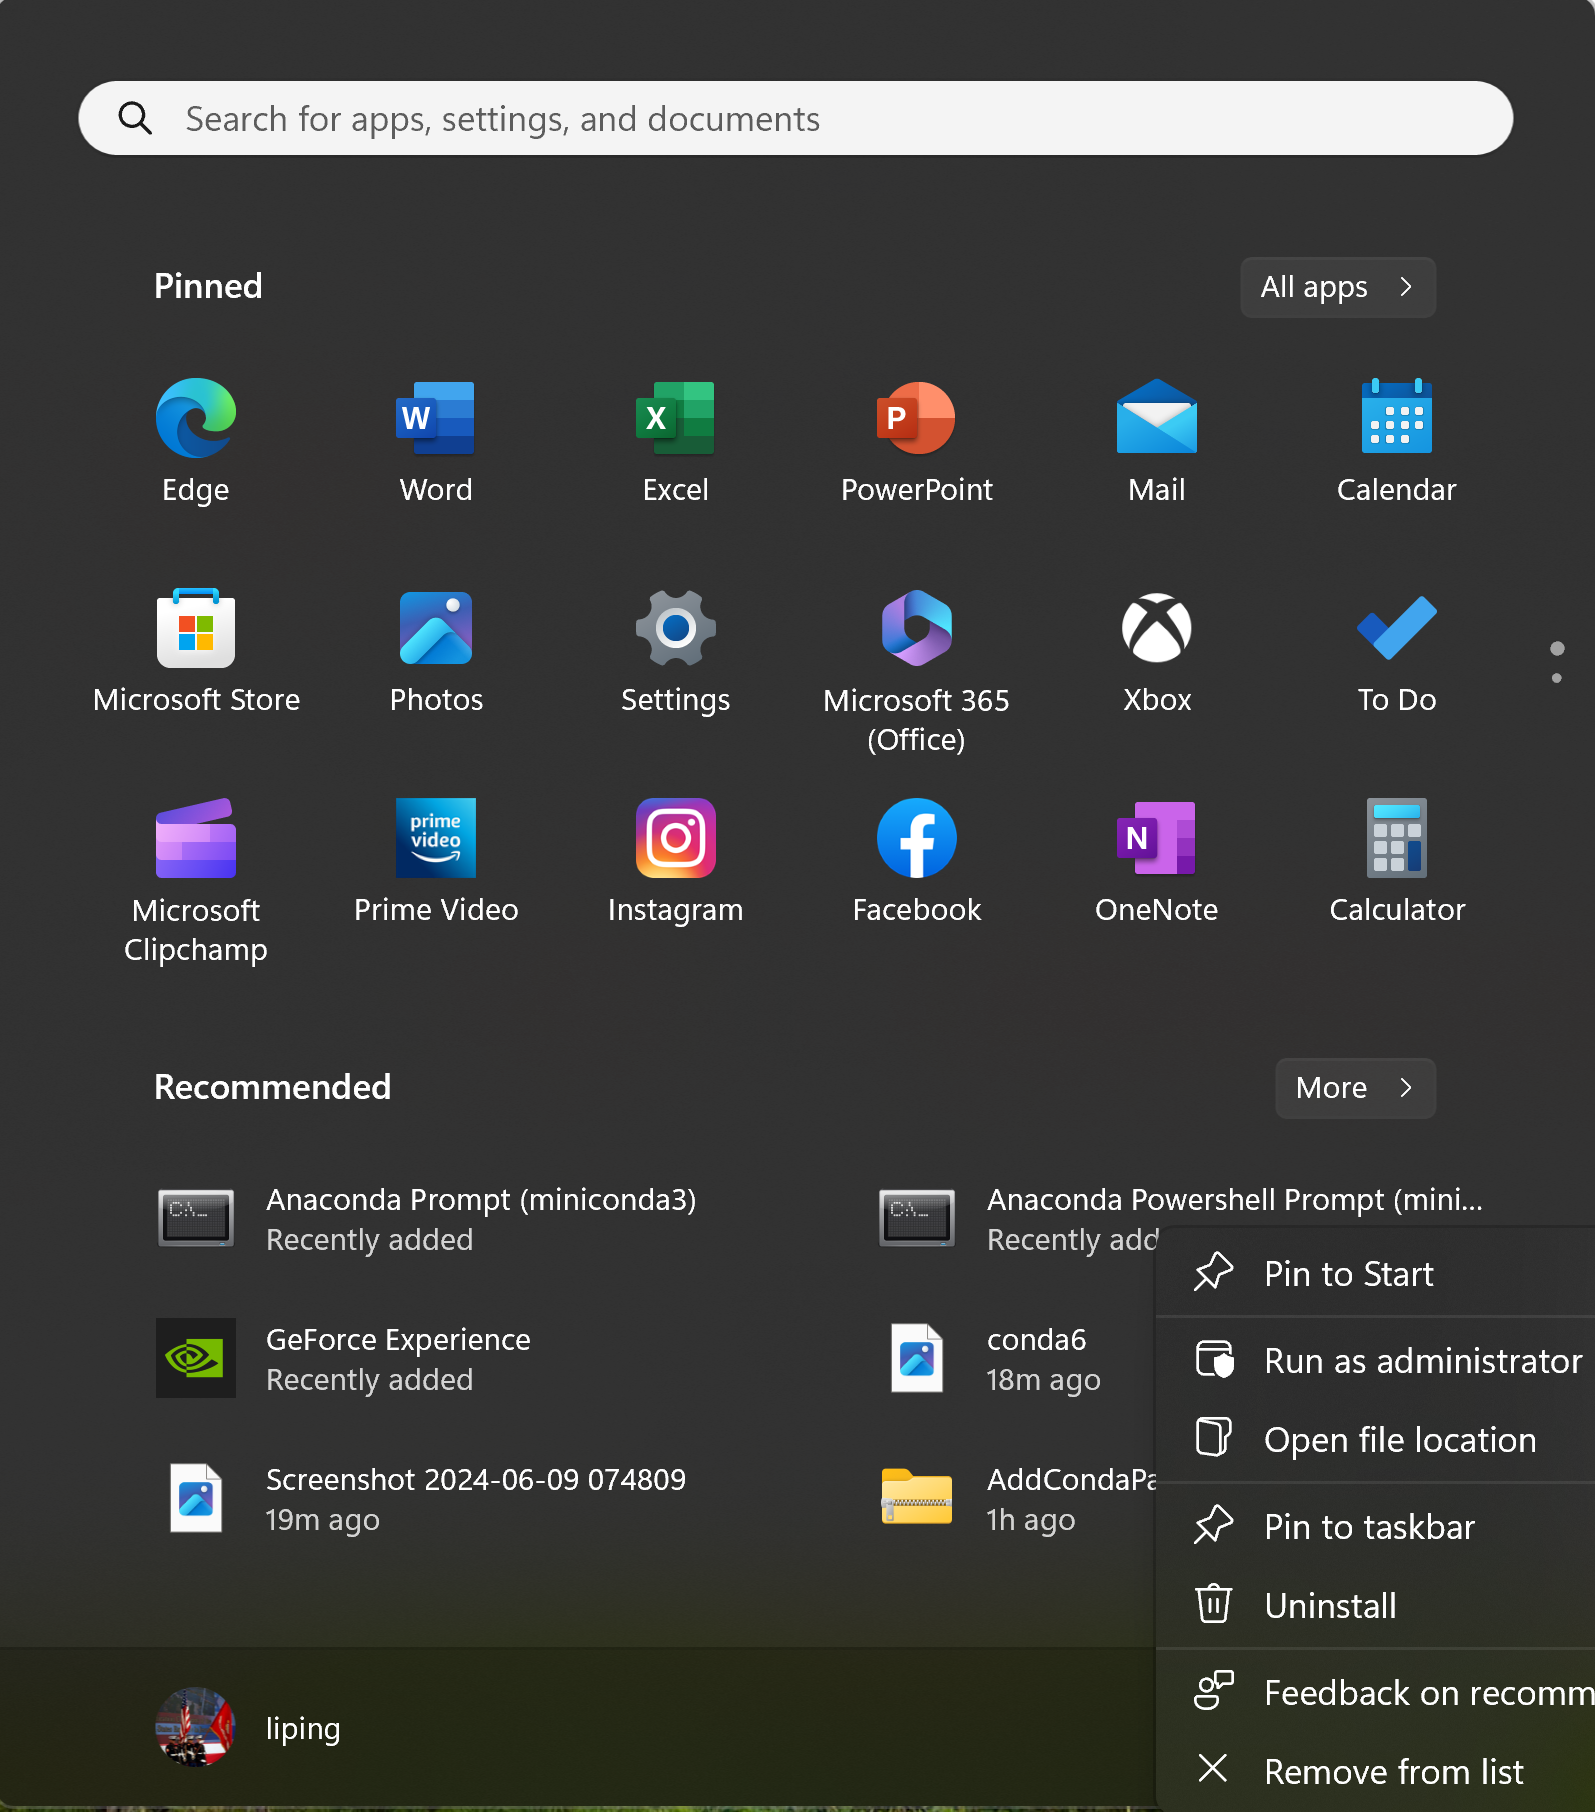
- Now you can open Anaconda prompt (miniconda3 for standard users) and Anaconda Powershell Prompt (miniconda3 for power users and administrators) through Windows Start Menu. Click Windows menu, right mouse click on Anaconda Powershell Prompt and choose to Run as Administrator:
- Run the following commands to update conda and pip in the "base" conda environment
    conda update -n base -c defaults conda
    python.exe -m pip install --upgrade pip
Create and Remove Conda Environments
Best Practice: keep the base environment minimal—only containing Conda itself and its basic dependencies—and create separate, distinct environments for all specific projects to maintain maximum isolation.
Warning: Each class should create its own environments. Never install new packages to any environments created for other classes.
Create Generic Conda Environment for Introduction to Python
Click Windows menu, right mouse click on Anaconda Powershell Prompt and choose to Run as Administrator:
Run the following commands one by one to create a new virtual environment, say ISM315, and install required packages pandas, numpy, SciPy, scikit-learn, seaborn, matplotlib, Statsmodels, nbconvert, and notebook in it.
conda update -n base -c defaults conda
conda create --name ISM315 python=3.9
conda activate ISM315
C:\ProgramData\miniconda3\envs\ISM315\python.exe -m pip install --upgrade pip
conda install pandas

conda install scipy
conda install scikit-learn
conda install seaborn
conda install matplotlib
conda install SciPy
conda install Statsmodels
conda install nbconvert
conda install nltk
conda install gensim
conda install notebook
There are three ways to use Python in conda environment ISM315:
Approach 1: open Anaconda Prompt and type "conda activate ISM315" in the command line. Then type "python" to open the native python command line interface (CLI).
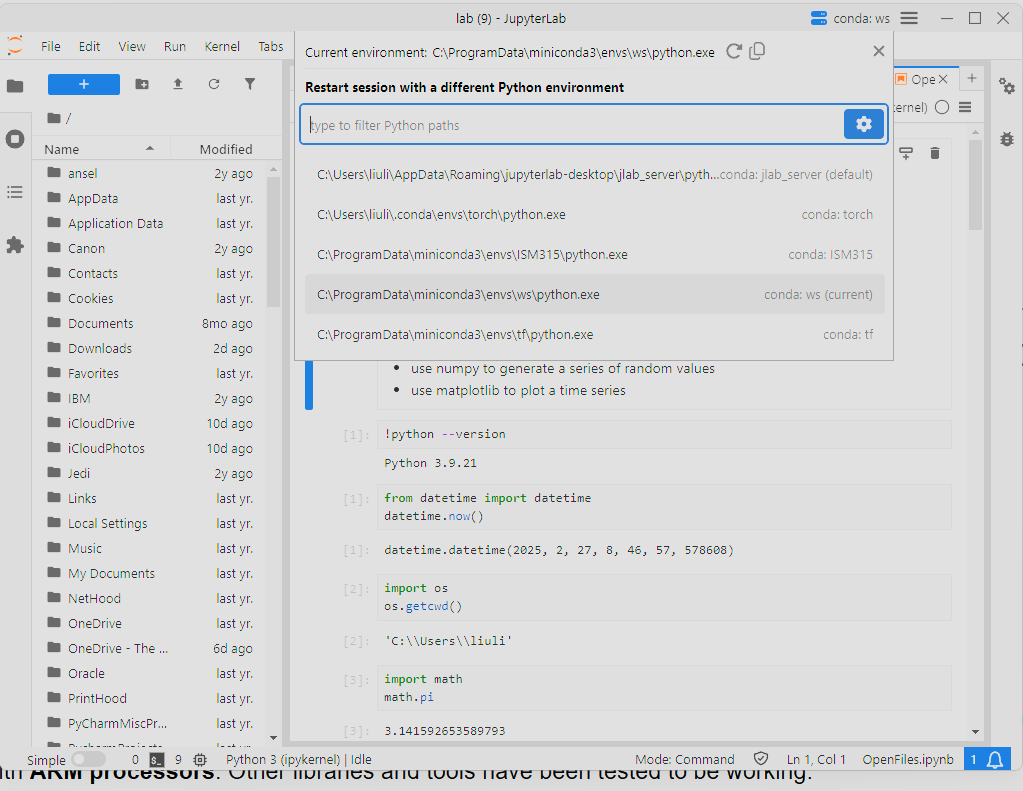
Approach 2: open Jupyterlab Desktop program, and click the conda environment selector (tow blue bars at the top right corner as follows) and choose ISM 315
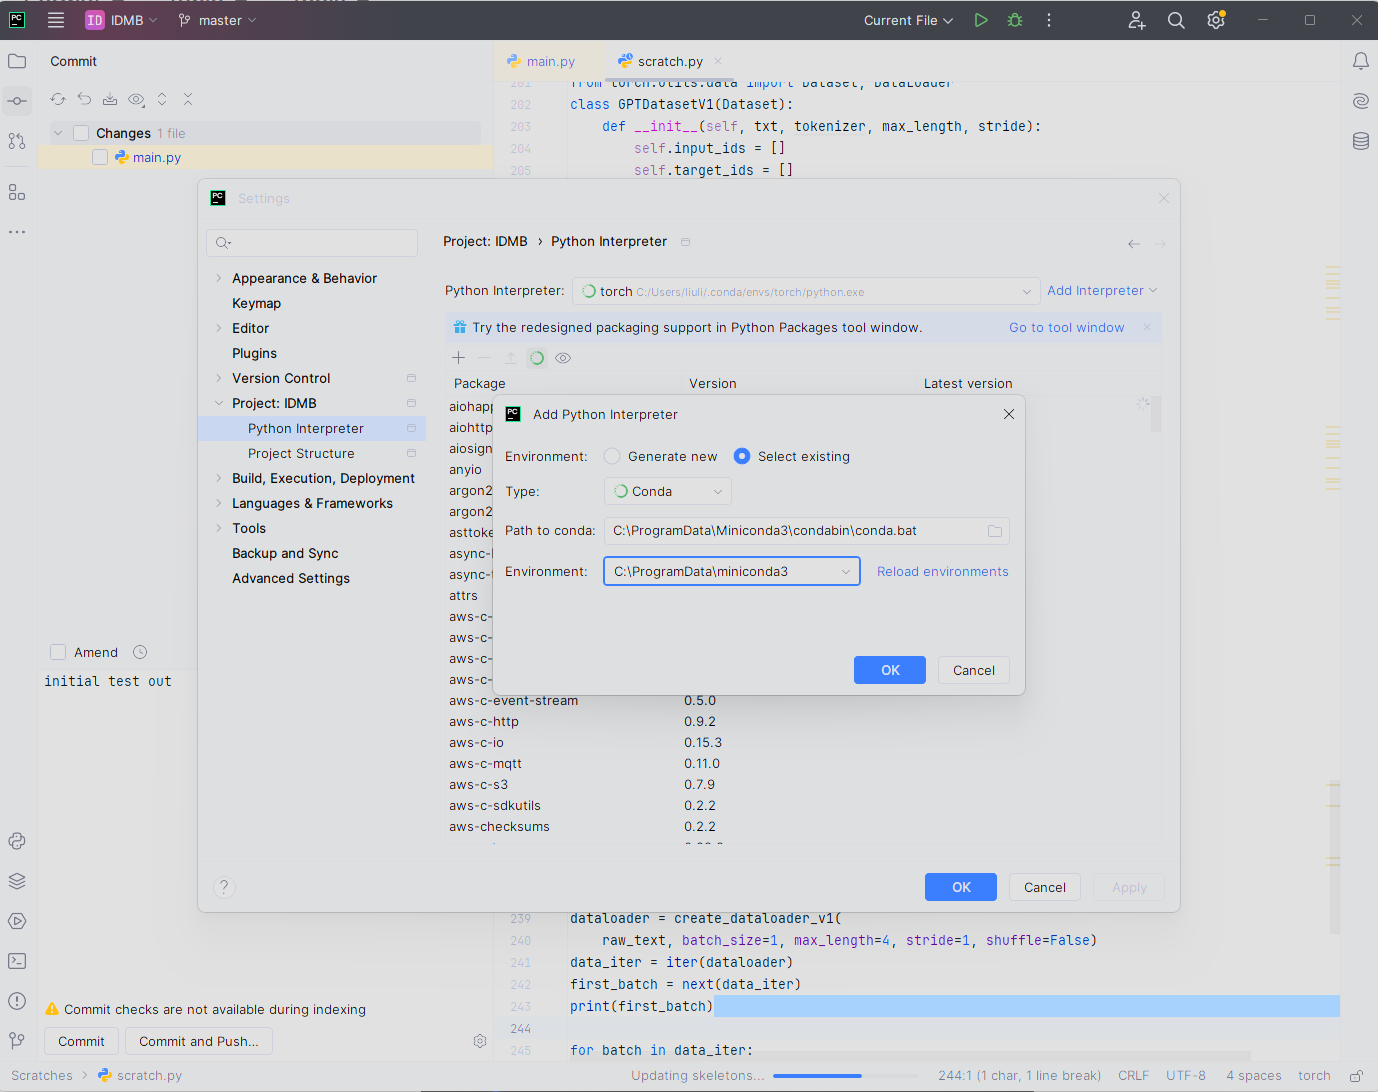
Approach 3: open PyCharm and go to File --> Settings menu, click Python Interpreter, then click on Add Interpreter link, choose Select Existing radio button, select conda type, and then select ISM315 from the envronment dropdown list (see screenshot below).
Remove Virtual Environment

In case you need to remove the virtual environment "ISM315", first exit out of ISM315 environment using command "conda deactivate".
To list all environments, use command "conda env list". To remove the "ISM315" environment,
conda remove --name r-tensorflow --all
Create Conda Environment for Running Tensor Flow in Python and R
Note the following before running the commands:
- Tensor Flow packages have compatibility issues with a few other packages such as SciPy, Spyder, etc. In particular, I found that Tensor Flow will not work in R if it is installed along with scipy, pandas, spyder package. So I suggest creating a separate virtual environment with Tensor Flow to be shared with R.
- All the commands should run without any warnings or errors. If there is any, go back to the prior steps to check if some steps were not performed or performed incorrectly.
- If you want to create a new virtual environment with support for advanced NVidia GPU acceleration, follow the follow-up guide.
- Tensor Flow will not run on some newer lightweight laptops with ARM processors. Other libraries and tools have been tested to be working.
Click Windows menu, right mouse click on Anaconda Powershell Prompt and choose to Run as Administrator:
Run the following commands one by one to create a new virtual environment called r-tensorflow and install required packages in it.
conda update -n base -c defaults conda

conda create --name r-tensorflow python=3.9
conda activate r-tensorflow
conda config --add channels defaults
C:\ProgramData\miniconda3\envs\r-tensorflow\python.exe -m pip install --upgrade pip
pip install tensorflow==2.10
pip uninstall numpy
conda install numpy==1.26.4
Now you should be able to test if TensorFlow package is installed correctly by running the following command:
        python -c "import tensorflow as tf; print(tf.reduce_sum(tf.random.normal([1000, 1000])))"


You can also type python and go to python environment and verify it using the following:

        from tensorflow.python.client import device_lib
        print(device_lib.list_local_devices())

STOP: If the above test is successful, you may stop now if you just want to install Tensor Flow for R. Follow Install Tensor Flow for R  to finish setup for R.
Remove Virtual Environment

In case you need to remove the virtual environment "tf", first exit out of tf environment using command "conda deactivate".
To list all environments, use command "conda env list". To remove the "tf" environmenent,
conda remove --name r-tensorflow --all
Create Conda Environments for Tensor Flow and IDE Tools for Machine Learning in Python

If you want to do machine learning using Tensor Flow in Python, follow the following to install a new conda environment and
additional python libraries for data sciences in Python and graphical interactive development environments.

First, you need to create a new virtual environment, for example, tf, as above using the code below:
conda update -n base -c defaults conda
conda create --name tf python=3.9
conda activate tf
C:\ProgramData\miniconda3\envs\tf\python.exe -m pip install --upgrade pip
pip install tensorflow
The following commands install additional packages such as libraries for data science and analytics and GUI tools
such as Spyder and Jupyter Notebook to run Python.
conda install pandas

conda install scipy
conda install scikit-learn
conda install seaborn
conda install matplotlib
conda install spyder
conda install notebook
Now you can type "spyder" command to open Spyder IDE or "jupyter lab" to open Jupyter Notebook.
For Jupyter Notebook, change the directory to the root directory by using command "cd c:\" before
the command "jupyter lab" so that you can save and open notebooks to your desired locations.

For example, type "jupyter lab" to open Jupyter Notebook and to run the same commands to
test Tensor Flow library there:
       from tensorflow.python.client import device_lib
        print(device_lib.list_local_devices())
In the future, to run Python with Tensor Flow, make sure to open Anaconda Prompt from
Windows menu, and then go to the "tf" virtual environment with the command:
    conda activate tf

PyCharm is another popular IDE for machine learning. You can download PyCharm Professional
from https://www.jetbrains.com/pycharm/download/?section=windows. Instructors and students may
apply for a free license for educational user from the company: https://www.jetbrains.com/academy/teaching/.
Create Environments for PyTorch

If you want to do machine learning using PyTorch in Python, follow the following to install a new conda environment and
additional python libraries for PyTorch without using GPU accelerator.

First, you need to create a new virtual environment, for example, torch, as above using the code below:
conda update -n base -c defaults conda
conda create --name torch python=3.9
conda activate torch
Then, go to https://pytorch.org/get-started/locally/ to create a command for your installation. To enable GPU support, use the command
conda install pytorch torchvision torchaudio pytorch-cuda=11.8 -c pytorch -c nvidia
If you don’t have advanced NVidia GPU, use the following for CPU:
conda install pytorch torchvision torchaudio cpuonly -c pytorch
Additionally, you can install "transformers" and "jupyterlab" packages as follows:
conda install transformers
conda install jupyter
Test the installation by going to python and run the following code:
import torch
print(torch.cuda.is_available())
print(torch.cuda.get_device_name(0))
Test the transformers and BERT and run the following in Python console:
#use BERT
from transformers import AutoTokenizer, AutoModel
tokenizer = AutoTokenizer.from_pretrained("bert-base-uncased")
model = AutoModel.from_pretrained("bert-base-uncased")
Create Conda Environments for Running Large Language Models and Agents
Open Anaconda Prompt administrator and run the following commands one at a time:
conda update -n base -c defaults conda
conda create --name agents python=3.11
Now activate a virtual conda environment using command like “conda activate agents”:
conda activate agents
Install necessary packages by run the following command one at a time:
C:\ProgramData\miniconda3\envs\agents\python.exe -m pip install --upgrade pip
Pip install pandas
pip install scipy
pip install scikit-learn
pip install seaborn
pip install matplotlib
pip install Statsmodels
pip install nbconvert
pip install notebook
python -m pip install -U openai openai-agents
pip install composio composio-openai-agents
Note: The above installation is using pip. To use conda intsall, rather than pip install, run the command "conda install -c conda-forge openai" to install openai package. In case of error in import OpenAI from openai, remove existing package installations using "conda uninstall openai" or "pip uninstall openai". In some cases, you may need to delete folders like C:\Users\XXXX\AppData\Roaming\Python\Python39\site-packages\openai
Now open Jupyterlab Desktop and set conda environment to agents. Run “!pip list” or “!conda list” to check if openai is in the list.
Create Conda Environments for Running Langflow Apps
You need to create a brand new conda environment to install langflow package. Open Anaconda Prompt as an administrator and type the commands:
conda create -n lf-run python=3.11 -y
conda activate lf-run
After getting into the lf-run environment, run the commands to install langflow package:
pip install -U pip
pip install "langflow" "sqlalchemy<2.1" "sqlmodel<0.0.23"
Also, since we want to run Python code in JupyterLab Desktop, install notebook package also:
pip install notebook
Create Conda Environments for Chroma DB
To create a new environment, “chromadb”, open Anaconda Prompt as an administrator and type the commands:
Conda create --name chromadb python=3.11
conda activate chromadb
Now install “chromadb” and “jupyterlab” packages:
pip -q install chromadb
conda install jupyterlab
Install Standalone Python 3.9 (without Miniconda, Route 2)
Install Python in Windows:
- Go to https://www.python.org/downloads/release/python-390/ and download Python 3.9 for Windows 64-bit (later versions may not work for Tensor Flow package).
- Double click to install Python and choose Custom Installation for all users. Check
Add python.exe to PATH box.
- Select all optional features in the next screen if you choose customized installation
- Select Install Python 3.9 for all users for customized installation and add Python to environment variables
- Press Install to finish installing Python
Install Jupyter Lab for Python:
- Run CMD as Administrator
- To check your Python installation, type command: python --version
- Type following commands to install Jupyter Notebook and Jupyter Lab:
pip install notebook
pip install ipykernel
python -m ipykernel install
pip install jupyterlab
Install Tensor Flow for Python:
pip install tensorflow
Install Python Libraries:
You may also try to install packages using pip, for example, openpyxl package for managing Excel data and Pillow for pictures:
pip install openpyxl
pip install Pillow

Test Python Installations:
- To open JupyterLab, type command: jupyter lab in Windows Command Line
- Try to run the following Python code to copy a picture named A11.jpg into the A1 cell of your Excel file:
import openpyxl
from openpyxl.drawing.image import Image
workbook = openpyxl.Workbook()
worksheet = workbook.active
img = Image('c:\\temp\\A11.jpg')
worksheet.add_image(img, 'A1')
workbook.save('c:\\temp\\photo.xlsx')
Use Python Command Line, Jupyter Lab, PyCharm
To use Python in command line tools, go to Windows start menu, and open Anaconda Prompt (don't use Windows Prompt). You can type "python --version" to check if the python is installed.
To go to a special virtual environment such as "tf" that we installed above, type command
conda activate tf
To install new packages such as "openpyxl", use the command
conda install openpyxl
To run python code, either go to Python command line environment by typing
python
or go web-based environment by typing
jupyter Lab
or Windows environment by typing
spyder
You can also install and configure PyCharm, which supports creating virtual environments for Python with Conda. The following procedure applies to all supported operating systems. Use the platform switcher at the top of this page to view shortcuts specific to your operating system.
|